
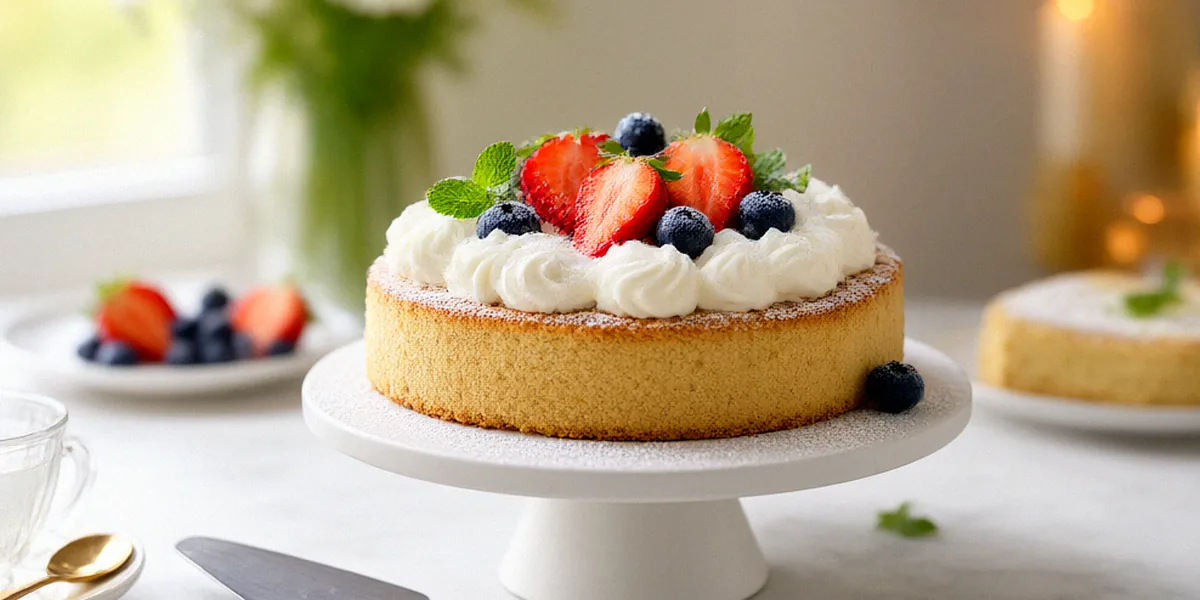
Master Desserts and Pastry with Our Independent Australian Baking Blog
It’s a 38-degree Saturday afternoon in February, the fan is cranking, and you’ve just watched your beautifully chopped block of dark chocolate seize into a grainy, streaky mess for the third time this summer. Sound familiar? If you’ve ever tried to temper chocolate in an Australian heatwave, laminate croissant dough in a Brisbane kitchen, or pull a lemon tart out of the oven only to find a sad, soggy base, you’re in exactly the right place. Home baking in this country comes with its own set of quirks — humidity that refuses to cooperate, ingredients that behave differently depending on your postcode, and a pantry culture that’s genuinely world-class once you know where to look. At Philippa Sibley, we’re an independent dessert and pastry technique blog written specifically for Australian home bakers who want to move past guesswork and into confident, repeatable results. Whether you’re chasing a shatteringly crisp tart shell, a glossy tempered chocolate finish, or the perfect marshmallow centre in a pavlova, we’re here to break it all down — no professional kitchen required.
Essential Pastry Techniques Every Home Baker Should Master
Pastry has a reputation for being fussy, but most of the frustration comes down to a handful of core techniques that, once understood, unlock almost everything else. Lamination, crumb structure, gluten development, fat distribution and temperature control are the real building blocks behind every flaky tart shell, buttery croissant and tender shortcrust. In Australia, we also have to factor in some uniquely local variables: butter that softens faster than you’d like in a warm kitchen, flour with protein levels that vary between brands, and humidity that can turn a clean bench into a sticky disaster zone. We’ve spent years testing and retesting these techniques in real Australian home kitchens, and we’ve learned that the right ingredients matter just as much as the method. That’s why we consistently reach for Western Star butter — its high fat content gives pastry a richer flavour and a more reliable, workable texture than many alternatives on the shelf. For flour, Laucke produces a range of consistent, well-milled options that behave predictably in everything from shortcrust to laminated doughs, which takes a lot of the guesswork out of a recipe.
Before you dive into any specific pastry, it helps to understand what you’re actually trying to achieve. Flakiness comes from layers of fat trapped between layers of dough — when the water in the butter turns to steam in the oven, it pushes those layers apart. Tenderness, on the other hand, comes from limiting gluten development, which is why we handle shortcrust as little as possible. Once you internalise these two principles, you can troubleshoot almost any pastry problem on your own.
Perfecting Shortcrust and Pâte Sablée for Tarts
Shortcrust and pâte sablée are the workhorses of the tart world, and getting them right is the foundation of everything that follows. Shortcrust is the simpler of the two — flour, cold butter, a little sugar, a pinch of salt and just enough cold water or egg to bring it together. Pâte sablée, the classic French “sandy” pastry, adds more sugar and often almond meal or icing sugar for a finer, more delicate crumb that’s ideal for sweet tarts.
The single biggest mistake we see home bakers make is overworking the dough. The moment you start kneading shortcrust like bread, you develop gluten, and gluten is the enemy of tenderness. Our rule of thumb is to stop the moment the dough just holds together when squeezed. If you can still see streaks of butter running through the flour, that’s a good thing — those streaks become flaky layers in the oven.
Temperature is your other critical ally. In an Australian summer, butter can go from fridge-cold to greasy in minutes, so we recommend:
- Dice your butter and return it to the fridge for 10 minutes before you start.
- Use a food processor on pulse for the initial rubbing-in stage rather than your fingertips on a hot day.
- Chill the finished dough for at least 30 minutes before rolling — an hour is even better.
- Work on a cool surface, and if your bench is warm, place a chilled baking tray underneath your rolling mat.
- Roll between two sheets of baking paper to avoid adding extra flour, which toughens the pastry.
We also find that Western Star butter’s high fat content makes it particularly forgiving here — it holds its structure a little longer at room temperature, giving you more working time before things get sticky. For pâte sablée, we like to add a tablespoon of almond meal, which contributes to that tender, melt-in-the-mouth texture and adds a subtle nutty note that pairs beautifully with fruit fillings.
Resting the dough isn’t just about chilling the butter — it also allows the gluten that has formed to relax, which prevents shrinkage during baking. If you’ve ever pulled a tart shell from the oven and watched the sides slump down, insufficient resting is almost always the culprit.
Laminating Dough in Humid Australian Climates
Lamination is the technique behind croissants, danishes, puff pastry and any dough where you fold butter into layers and roll it out repeatedly. It’s also the technique that suffers most in an Australian summer. High humidity softens butter quickly, and once the butter starts to melt into the dough, you lose the distinct layers that create flakiness. The result is a greasy, bready pastry rather than a crisp, shattering one.
Our approach to laminating in warm weather is built around three principles: keep everything cold, work quickly, and don’t be afraid to stop and chill. We start with butter that’s been beaten into a flat, pliable block and chilled until it’s firm but still slightly bendable — if it cracks when you press it, it’s too cold; if your finger sinks in, it’s too warm. The dough itself should be cold too, ideally around 4 to 6 degrees Celsius.
Each fold should be followed by a proper rest in the fridge — at least 30 minutes, and longer if your kitchen is warm. We know it’s tempting to rush through the folds, but laminating is a patience game. If at any point the butter starts to squish out at the edges, stop immediately, wrap the dough and chill it for 20 minutes. You can always pick up where you left off.
Humidity also affects the surface of the dough, which can become tacky and difficult to roll. A light dusting of flour helps, but too much flour will dry out the layers and create a tough pastry. We prefer to use a pastry brush to dust off excess flour between folds, keeping the dough clean and the layers distinct.
For bakers in Darwin, Brisbane or northern NSW, we sometimes recommend working in an air-conditioned room and even chilling your rolling pin in the freezer between folds. It sounds fussy, but the difference in the final result is dramatic. Once you’ve nailed lamination in a warm climate, you can produce croissants and danishes that genuinely rival a good bakery.
Blind Baking and Preventing Soggy Bottoms
There’s nothing more disappointing than a beautifully filled tart with a soggy, undercooked base. Blind baking — pre-baking the pastry shell before adding the filling — is the solution, and it’s a technique every tart baker needs in their repertoire.
The process itself is straightforward: line your chilled pastry shell with baking paper, fill it with weights (ceramic baking beads, dried beans or rice all work), and bake until the edges are set and lightly golden. Then remove the weights and paper and return the shell to the oven for a few more minutes to dry out the base. This second bake is crucial — it’s what gives you that crisp, biscuity layer that stands up to wet fillings.
But blind baking alone isn’t always enough. For very wet fillings, like a custard or a fruit curd, we take extra precautions:
- Brush the still-warm pastry shell with a thin layer of beaten egg white or melted chocolate and return it to the oven for 2 minutes to set. This creates a moisture barrier.
- Seal any small cracks in the pastry with a little raw dough before the final bake.
- Chill your filling thoroughly before pouring it into the shell.
- Bake the filled tart at a lower temperature for longer, so the custard sets without the pastry burning.
Another tip specific to Australian kitchens: our ovens often run hotter or cooler than the dial suggests, so an oven thermometer is one of the best small investments you can make. Knowing your oven’s true temperature is the difference between a perfectly golden shell and a burnt one.
Finally, don’t skip the resting step. A pastry shell that’s been chilled thoroughly before blind baking holds its shape far better and is much less likely to shrink or slump. We aim for at least 30 minutes in the fridge, and often longer if we have the time.
The Art of Tempering Chocolate: A Step-by-Step Guide
Tempering chocolate is the technique that intimidates home bakers more than any other, and we completely understand why. It requires precise temperature control, a bit of patience and an understanding of how chocolate actually behaves. But once you’ve mastered it, the payoff is enormous — glossy, snappy chocolate with a professional shine that transforms tarts, cakes, truffles and decorations.
Tempering is essentially the process of encouraging cocoa butter to crystallise in a stable form. When chocolate is melted and cooled in a controlled way, the fat molecules align into a tight, uniform structure that sets hard and shiny at room temperature. If you skip tempering, the cocoa butter sets in a loose, unstable structure, and you end up with streaky, soft chocolate that never quite firms up.
We recommend starting with good-quality couverture, which contains a higher percentage of cocoa butter than compound chocolate and tempers more reliably. Callebaut is our go-to for its consistency and clean flavour, and Lindt is widely available in Australian supermarkets and works beautifully for smaller batches. Once you’ve worked with good chocolate, you’ll never want to go back.
Understanding Chocolate Crystallization
Cocoa butter can crystallise into six different forms, and only one of them — Form V — gives you the glossy, snappy finish you want. The others produce soft, streaky or grainy results. Tempering is simply the process of guiding the chocolate through a specific temperature curve that favours Form V crystals.
Dark chocolate is tempered by heating it to around 45 to 50 degrees Celsius to melt all existing crystals, cooling it to around 27 degrees to encourage the right crystals to form, and then gently bringing it back up to 31 to 32 degrees, which is the working temperature. Milk and white chocolate have slightly lower target temperatures because of their added milk solids and sugar.
Understanding this curve is what separates a hit-and-miss tempering experience from a consistent one. Once you know why you’re cooling and reheating, you can adapt to different chocolates, room temperatures and batch sizes without relying on guesswork.
Seeding Method vs. Tabling Method
There are two main methods for tempering chocolate at home, and each has its place depending on your setup and how much chocolate you’re working with.
The seeding method is the more accessible of the two and the one we recommend for most home bakers. You melt two-thirds of your chocolate over a bain-marie or in short bursts in the microwave, then remove it from the heat and add the remaining one-third, finely chopped, into the melted chocolate. Stir continuously until the added chocolate melts and the mixture cools to the target temperature. Those unmelted pieces act as “seeds” of stable crystals, encouraging the whole batch to set correctly.
The tabling method is the traditional French technique, and it’s what you’ll see in professional pastry kitchens. You pour about two-thirds of the melted chocolate onto a cool marble slab and work it with a scraper and palette knife until it thickens and cools to around 27 degrees. Then you scrape it back into the bowl with the remaining warm chocolate and stir until it reaches working temperature. This method gives you very precise control and is excellent for large batches, but it requires a marble slab and a bit of physical effort.
For home bakers, the seeding method is almost always the better starting point. It’s cleaner, requires less equipment, and produces excellent results once you get the hang of it. The tabling method is worth learning if you plan to temper frequently or in larger quantities, and it’s particularly useful in warm weather because the marble slab helps dissipate heat quickly.
Troubleshooting Tempering in Warm Weather
Australian summers are genuinely tough on chocolate. High ambient temperatures and humidity make it difficult to hold tempered chocolate at working temperature, and the chocolate can thicken or seize before you’ve finished using it. We’ve learned a few tricks over the years that make a real difference.
First, work in an air-conditioned room if you can, or at least in the coolest part of the house. Tempering chocolate in a 30-degree kitchen is an uphill battle, and no technique will fully compensate for a hot room. Second, use a cool marble slab if you have one — not only for the tabling method, but also as a surface for working with tempered chocolate. The marble stays cooler than wood or laminate and helps the chocolate set quickly once you’ve poured or piped it.
Other strategies we rely on include:
- Chill your bowls, spatulas and moulds in the fridge before you start.
- Work in small batches so the chocolate doesn’t sit around long enough to lose temper.
- Keep a heatproof bowl of warm water nearby to briefly re-warm chocolate that’s starting to thicken — but only for a few seconds at a time.
- Have a thermometer on hand at all times, ideally a digital one with a fast read.
If your chocolate does go out of temper — it looks streaky, soft or dull — don’t panic. You can simply re-melt it and start the tempering process again. Chocolate is forgiving in that way; there’s no permanent damage, only a bit of extra time.
Humidity adds another layer of complexity. Chocolate absorbs moisture from the air, which can cause it to seize and become grainy. On very humid days, we try to work quickly, keep the chocolate covered when not in use, and avoid any contact with water. A dehumidifier in the kitchen can help on the worst days.
Creating Stunning Tarts: From Classic to Contemporary
Tarts are the perfect canvas for a home baker’s creativity, and they’re also one of the most rewarding things you can make. A well-made tart combines a crisp, buttery shell with a filling that balances flavour, texture and visual appeal. In Australia, we’re lucky to have access to extraordinary produce — tropical fruits, berries, citrus and stone fruit — that gives our tarts a distinctly local character.
We think of tarts in two broad categories: classic French tarts, which rely on precise technique and refined flavours, and contemporary tarts, which play with texture, colour and seasonal ingredients. Both have a place in the home kitchen, and both benefit from the same foundational skills you’ve already been building.
One of our favourite things about tarts is their versatility. A single tart shell recipe can become a lemon tart, a chocolate ganache tart, a passionfruit curd tart or a fresh fruit tart depending on the filling and finish. Once you’ve mastered the shell, you’ve unlocked a whole world of possibilities.
Classic French Tarts with an Aussie Twist
The classic French tart repertoire is a beautiful place to start. Tarte au citron, tarte aux pommes, tarte à la frangipane — these are the tarts that have been perfected over centuries in French patisseries, and they translate beautifully to Australian kitchens with a few local adjustments.
Take the lemon tart. The French version is typically quite sharp and intense, balanced by a thin layer of sweet pastry. In Australia, we like to soften the acidity slightly and sometimes add a touch of native finger lime or lemon myrtle for a distinctly local twist. Queen vanilla extract is a staple in our kitchens for adding warmth and depth to custard-based fillings — a small amount goes a long way, and it rounds out the sharpness of the citrus beautifully.
Another classic we love to adapt is the apple tart. Instead of the traditional French apples, we often use Pink Lady or Granny Smith, which hold their shape well and have a lovely balance of sweet and tart. A thin layer of frangipane underneath the apples adds richness and helps absorb any juices, preventing a soggy base.
The key to a successful classic tart is restraint. French patisserie is about precision and balance, not excess. A simple lemon tart with a perfectly crisp shell and a silky, just-set custard is more impressive than a complicated tart with too many competing elements.
Seasonal Fruit Tarts: Mango, Passionfruit, and Berries
Seasonal fruit tarts are where Australian baking really shines. Our produce is exceptional, and a tart that showcases ripe, in-season fruit is one of the simplest and most beautiful desserts you can make.
Passionfruit is a quintessential Australian tart flavour, often paired with chocolate or meringue. Its intense, tropical tang cuts through rich fillings beautifully, and its distinctive aroma is unmistakable. We love a passionfruit curd tart topped with a light Italian meringue, or a chocolate ganache tart finished with a passionfruit glaze that adds both colour and acidity.
Mango is another favourite. In summer, when mangoes are at their peak, a simple mango tart with a vanilla crème pâtissière and a thin layer of apricot glaze is hard to beat. The key is to use fruit that’s perfectly ripe — underripe mango is bland, and overripe mango is mushy.
Berries are the third pillar of our seasonal tart repertoire. Strawberries, raspberries, blueberries and blackberries all work beautifully, either alone or in combination. We like to arrange them on a base of vanilla pastry cream or mascarpone, then finish with a light glaze to give them shine and protect them from drying out.
A few tips for seasonal fruit tarts:
- Always taste your fruit before you commit to a recipe — sweetness varies enormously.
- Use a light apricot or apple glaze to give the fruit a professional shine.
- Assemble fruit tarts as close to serving as possible to keep the pastry crisp.
- Balance sweetness with a little acidity — a squeeze of lemon or lime can transform a tart.
We also love to incorporate native Australian ingredients where they fit. Riberry, quandong and Davidson plum all bring unique flavours to fruit tarts, and they’re increasingly available from specialist suppliers and farmers’ markets.
Decorative Techniques for Show-Stopping Tarts
A tart that tastes incredible is a wonderful thing, but a tart that also looks stunning is a genuine showpiece. Decorative techniques don’t have to be complicated — with a few simple skills, you can elevate any tart from homely to spectacular.
Piping is one of the most versatile decorative skills. A simple star nozzle can transform a plain cream filling into a beautiful rosette pattern, and a fine plain nozzle is perfect for delicate chocolate ganache lines. Practice on a piece of baking paper before piping onto the tart itself.
Tempered chocolate is another powerful decorative tool. Once you’ve mastered tempering, you can create chocolate curls, shards, cigars and even delicate chocolate lace. These elements add height, texture and visual interest to a tart, and they taste as good as they look.
Fresh fruit, edible flowers and herbs are also wonderful finishing touches. A few mint leaves, a scatter of edible violets or a dusting of finely grated citrus zest can lift a simple tart into something special. We love using micro herbs and edible flowers from local growers — they’re increasingly easy to find at farmers’ markets and specialty grocers.
Finally, don’t underestimate the power of a simple glaze. A thin layer of apricot glaze brushed over fruit gives it a beautiful shine and helps it stay fresh. A dusting of icing sugar, a drizzle of caramel or a scattering of crushed nuts can also add texture and visual appeal with minimal effort.
Australian Baking Traditions and Modern Twists
Australian baking has a rich and distinctive heritage, shaped by our climate, our multicultural population and our love of simple, generous desserts. From the humble lamington to the ever-contested pavlova, our national desserts are woven into the fabric of family gatherings, school fundraisers and summer celebrations.
At Philippa Sibley, we love exploring these traditions and finding ways to modernise them without losing what makes them special. A classic recipe is a classic for a reason, and our goal is to honour that while adding our own contemporary touches.
We also love discovering lesser-known Australian baking traditions — regional specialties, heritage recipes passed down through families, and the quiet classics that don’t always get the attention they deserve. Anzac biscuits, Golden Syrup dumplings, pumpkin scones and honey joys all have their place in our national baking story.
Lamingtons: From Classic to Gourmet
Lamingtons are a classic Australian dessert made with sponge cake, chocolate icing, and coconut. They’re simple, humble and utterly delicious, and they’ve been a fixture of Australian baking since the early 20th century. The classic version is a square of light sponge, dipped in thin chocolate icing and rolled in desiccated coconut.
Making lamingtons at home is more achievable than many people think, but there are a few techniques that make the difference between a good lamington and a great one. The sponge needs to be light and airy, which means whipping the eggs and sugar thoroughly and folding in the flour gently. The chocolate icing should be thin enough to coat but thick enough to cling — too thin and it soaks into the sponge, too thick and it won’t spread evenly.
Once you’ve mastered the classic, there’s a whole world of gourmet variations to explore. We love:
- Raspberry lamingtons with a layer of raspberry jam and a pink icing glaze.
- Passionfruit lamingtons with passionfruit added to the icing for a tropical twist.
- Mocha lamingtons with a coffee-infused chocolate icing.
- Matcha lamingtons with white chocolate icing and matcha powder for a modern, Japanese-inspired take.
- Lamington ice cream cakes, where the sponge is layered with ice cream and coated in chocolate and coconut.
The key to any lamington variation is to keep the sponge light and the coating balanced. Too much icing or coconut overwhelms the delicate cake, so we aim for a thin, even coating that complements rather than dominates.
Pavlova: Perfecting the Crunch and Marshmallow
The pavlova is arguably Australia’s most beloved dessert, and it’s also one of the most debated. The perfect pavlova has a crisp, dry exterior that shatters when you cut into it, and a soft, marshmallow centre that’s pillowy and light. Achieving both in the same dessert requires a bit of technique and a lot of patience.
The foundation is a good meringue. Egg whites should be at room temperature and completely free of any yolk or grease, and the bowl and whisk should be spotlessly clean. We add the sugar gradually, a spoonful at a time, and whip until the meringue is stiff and glossy — when you rub a little between your fingers, it should feel smooth, not gritty.
A stabiliser helps too. A teaspoon of cornflour and a teaspoon of white vinegar or lemon juice added at the end of whipping gives the meringue structure and helps create that marshmallow centre. Some bakers also add a pinch of cream of tartar, though we find the vinegar is usually enough.
Baking the pavlova is where patience really matters. We bake ours at a low temperature — around 120 degrees Celsius — for about 90 minutes, then turn the oven off and leave the pavlova inside to cool completely. This slow cooling prevents cracking and ensures that the interior stays soft and marshmallowy.
Humidity is the enemy of pavlova, so on humid days we avoid making one if we can, or we bake it a little longer to drive out more moisture. Once it’s cooled, the pavlova should be stored in an airtight container and used the same day for the best texture.
For toppings, the classic combination of whipped cream and fresh fruit is hard to beat. We love passionfruit, strawberries, kiwi fruit and mango, and a scattering of mint leaves adds a fresh finish. A drizzle of passionfruit pulp over the cream is one of our favourite touches.
Anzac Biscuits and Other Heritage Recipes
Anzac biscuits are one of Australia’s most treasured heritage recipes, and they carry a story that makes them all the more meaningful. Originally made by wives and mothers to send to soldiers overseas during the First World War, they were designed to keep well without refrigeration — which is why they contain no eggs and rely on Golden Syrup and bicarb soda for their structure and chew.
Making Anzac biscuits at home is simple, but there are a few details that make a real difference. Golden Syrup is essential — it gives the biscuits their characteristic caramel flavour and chewy texture. We use a good-quality rolled oat, and we don’t overmix the dough once the dry ingredients are added. The biscuits should be golden brown at the edges and slightly soft in the centre when they come out of the oven; they’ll firm up as they cool.
Beyond Anzac biscuits, there’s a whole world of Australian heritage recipes worth exploring. Golden Syrup dumplings, pumpkin scones, honey joys, caramel slice and vanilla slice are all part of our national baking story, and each one has its own techniques and traditions.
We also love experimenting with modern twists on heritage recipes. A salted caramel Anzac biscuit, a matcha honey joy or a passionfruit caramel slice are all examples of how traditional recipes can evolve while still honouring their roots. And yes — we’ve even seen Vegemite used in baking, most successfully in savoury scrolls, cheese scones and a rather surprising Vegemite and caramel combination that actually works. It’s a bold ingredient, but in small quantities it adds a deep umami note that can be genuinely delicious.
Building Your Baking Community: Tips, Tools, and Resources
Baking is often a solitary pursuit, but it doesn’t have to be. One of the things we love most about the Australian baking community is how generous and supportive it is — home bakers sharing tips, troubleshooting together and celebrating each other’s successes. We’re proud to be part of that community, and we want to help you build your own baking network.
Whether you’re a beginner looking for your first tart tin or an experienced baker searching for a specific couverture chocolate, having the right tools and ingredients makes an enormous difference. And having a community to turn to when things go wrong — because they will, sometimes — makes the whole journey more enjoyable.
Essential Tools for the Home Pastry Chef
You don’t need a professional kitchen to make beautiful pastry, but a few key tools will make your life much easier. Here are the essentials we recommend to every home baker:
- A digital kitchen scale — pastry is a precision game, and volume measurements are unreliable.
- A digital instant-read thermometer — essential for tempering chocolate and checking sugar syrups.
- A good rolling pin — we prefer a heavy French-style pin for even pressure.
- A tart tin with a removable base — makes releasing tarts infinitely easier.
- Ceramic baking beads or dried beans for blind baking.
- A fine-mesh sieve for dusting and straining.
- A silicone spatula and a good whisk.
- A pastry brush for glazes and dusting off excess flour.
- A marble slab if you plan to temper chocolate or work with pastry in warm weather.
- A stand mixer or hand mixer for meringues, creams and cake batters.
Kitchen Warehouse is a popular Australian retailer for baking tools and ingredients, and we’ve found their range of tart tins, thermometers and pastry tools to be excellent value. They also stock a wide range of specialty ingredients, from couverture chocolate to almond meal and everything in between.
If you’re just starting out, don’t feel like you need to buy everything at once. Build your toolkit gradually, prioritising the tools that match the recipes you’re most excited to make. A scale and a thermometer, in particular, are worth investing in early — they’ll improve your results across the board.
Where to Buy Quality Ingredients in Australia
Great baking starts with great ingredients, and Australia has an abundance of excellent suppliers. Here are some of our favourites:
- Western Star butter — our preferred butter for pastry, thanks to its high fat content.
- Laucke flour — consistent, well-milled and widely available.
- Callebaut and Lindt chocolate — reliable couverture options for tempering and ganache.
- Queen vanilla — a staple for custards, creams and cakes.
- Local farmers’ markets — for seasonal fruit, edible flowers and native ingredients.
- Specialty grocers — for almond meal, couverture chocolate, native spices and heritage flours.
- Kitchen Warehouse — for tools and a solid range of baking ingredients.
- Baking Mad — a great resource and supplier for home bakers looking for specialty items and inspiration.
We also encourage you to explore your local area. Many towns and cities have independent baking suppliers, millers and specialty food stores that stock ingredients you won’t find in supermarkets. These small businesses are often run by passionate people who are happy to share their knowledge, and supporting them is a wonderful way to build your baking community.
When it comes to seasonal produce, we can’t recommend farmers’ markets highly enough. Fruit that’s picked at peak ripeness and sold within a day or two of harvest tastes dramatically better than fruit that’s been shipped and stored, and it makes an enormous difference in tarts, pavlovas and fruit-based desserts.
Joining Our Baking Community and Workshops
We believe that baking is better when it’s shared, and we’d love for you to join our community. Our newsletter is where we share new recipes, technique deep-dives and behind-the-scenes insights from our test kitchen. It’s also where we announce upcoming workshops and events, and where we answer reader questions.
Our workshops are designed for home bakers of all levels, and they focus on hands-on technique rather than just recipes. We cover everything from pastry fundamentals and chocolate tempering to tart assembly and decorative finishes, and we tailor each session to the group’s interests and experience.
We’re also active on social media, where we share daily tips, troubleshooting advice and inspiration. It’s a wonderful way to connect with other home bakers, ask questions and share your own successes. Whether you’re a complete beginner or a seasoned baker, you’ll find a warm and welcoming community ready to support you.
To join our community, simply subscribe to our newsletter, follow us on social media, and reach out if you have questions. We love hearing from our readers, and we’re always happy to help troubleshoot a tricky bake or suggest a recipe for a special occasion.
Ready to take your baking to the next level? Subscribe to our newsletter today and join a community of Australian home bakers who are mastering desserts and pastry together — one technique at a time.
Frequently Asked Questions
Why is Western Star butter considered the best choice for pastry in Australia?
Western Star butter is a preferred brand for pastry in Australia due to its high fat content, which gives pastry a richer flavour and a more workable texture. The higher fat content also helps the butter hold its structure a little longer at room temperature, which is particularly useful in warm Australian kitchens. When you’re laminating dough or making shortcrust, that extra fat translates into flakier, more tender results.
How do I temper chocolate successfully during an Australian summer?
Tempering chocolate in Australian summer requires working in an air-conditioned room or using a cool marble slab. High ambient temperatures and humidity make it difficult to hold chocolate at working temperature, so we recommend chilling your bowls and tools beforehand, working in small batches, and keeping a thermometer on hand at all times. If your chocolate starts to thicken or lose temper, you can simply re-melt it and start again — chocolate is forgiving in that way.
What makes passionfruit such a popular flavour in Australian tarts?
Passionfruit is a quintessential Australian tart flavour, often paired with chocolate or meringue. Its intense, tropical tang cuts beautifully through rich fillings, and its distinctive aroma is unmistakable. Whether you’re making a passionfruit curd tart, a chocolate ganache tart with passionfruit glaze, or a pavlova topped with passionfruit pulp, this fruit brings a uniquely Australian character to your baking.
What exactly are lamingtons, and how can I make them gourmet?
Lamingtons are a classic Australian dessert made with sponge cake, chocolate icing, and coconut. The traditional version is a square of light sponge dipped in thin chocolate icing and rolled in desiccated coconut. To make them gourmet, try adding a layer of raspberry jam, infusing the icing with passionfruit or coffee, or using matcha and white chocolate for a modern twist. The key is to keep the sponge light and the coating balanced.
Where can I buy quality baking tools and ingredients in Australia?
Kitchen Warehouse is a popular Australian retailer for baking tools and ingredients, stocking everything from tart tins and thermometers to couverture chocolate and specialty flours. We also recommend exploring local farmers’ markets for seasonal produce, specialty grocers for native ingredients and heritage flours, and independent baking suppliers in your area. Baking Mad is another excellent resource for home bakers looking for specialty items and inspiration.
Mastering desserts and pastry is a journey, not a destination, and every bake — even the ones that don’t go to plan — teaches you something valuable. Our blog is here to support Australian home bakers every step of the way with reliable, tested techniques that work in real kitchens, with real ingredients, in real Australian conditions. From your first shortcrust to your hundredth tempered chocolate, we’re cheering you on.
Latest articles
- Summer Trifles and Frozen Desserts for a Hot Christmas Day
 Summer Trifles and Frozen Desserts for a Hot Christmas Day It’s 3pm on Christmas Day in Melbourne, the thermometer is nudging 40… Read more: Summer Trifles and Frozen Desserts for a Hot Christmas Day
- What TV Cooking Shows Get Right About Pastry
 What TV Cooking Shows Get Right About Pastry We have a confession to make. Most of us on the Philippa Sibley team… Read more: What TV Cooking Shows Get Right About Pastry
- Tempering Chocolate at Home Without a Marble Slab
 Tempering Chocolate at Home Without a Marble Slab We know the feeling: you’ve watched a pastry chef glide melted chocolate across a… Read more: Tempering Chocolate at Home Without a Marble Slab
- Plating Desserts Like a Restaurant
 Plating Desserts Like a Restaurant: A Home Baker’s Guide You’ve pulled a golden tart from the oven, the pastry crisp, the filling… Read more: Plating Desserts Like a Restaurant
- Perfect Shortcrust: Tips for Tart Shells
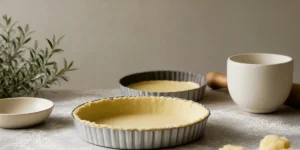 Perfect Shortcrust: Tips for Tart Shells You’ve rolled the dough, lined the tin, filled it with your best lemon meringue mixture, and… Read more: Perfect Shortcrust: Tips for Tart Shells
- Pastry Kitchen Essentials Under $100
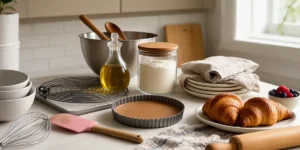 Pastry Kitchen Essentials Under $100: Our Top Picks for Australian Home Bakers Great pastry has never been about the size of your… Read more: Pastry Kitchen Essentials Under $100