
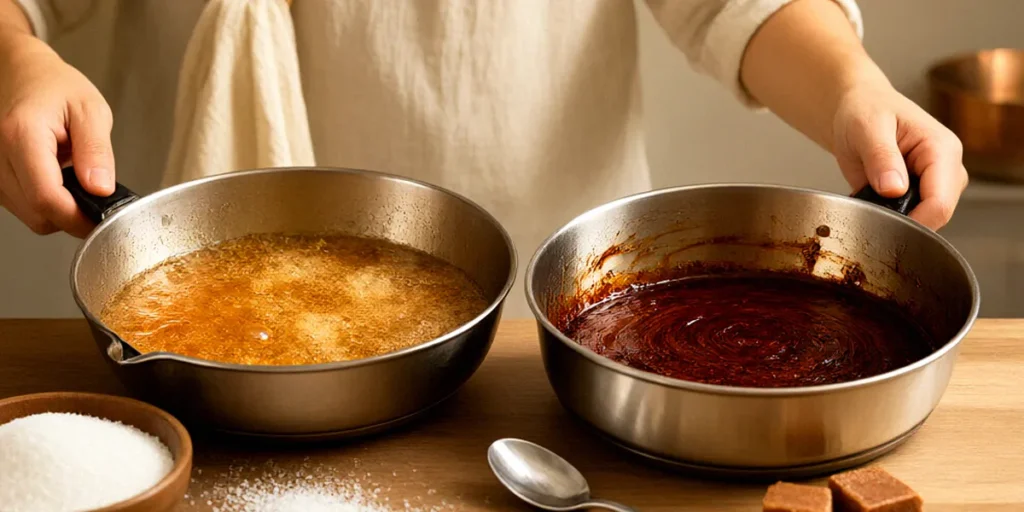
Caramel Without Fear: Wet vs Dry Method
We will admit it: caramel has terrified us too. There was the batch that seized into a sugary brick, the one that smoked out a Sydney rental kitchen, and the golden syrup tart that turned grainy somewhere between the stove and the sink. But here is the truth we have learned after years of practice — caramel is not difficult, it is just honest. It reacts instantly to heat, moisture, and movement, and once you understand those three things, you stop fearing it. By the end of this article, you will know exactly which method to choose for your next Aussie dessert, whether that is a salted caramel tart, a batch of chocolate-dipped caramels, or a simple drizzle over a pavlova.
Why Caramel Intimidates (and Why It Shouldn’t)
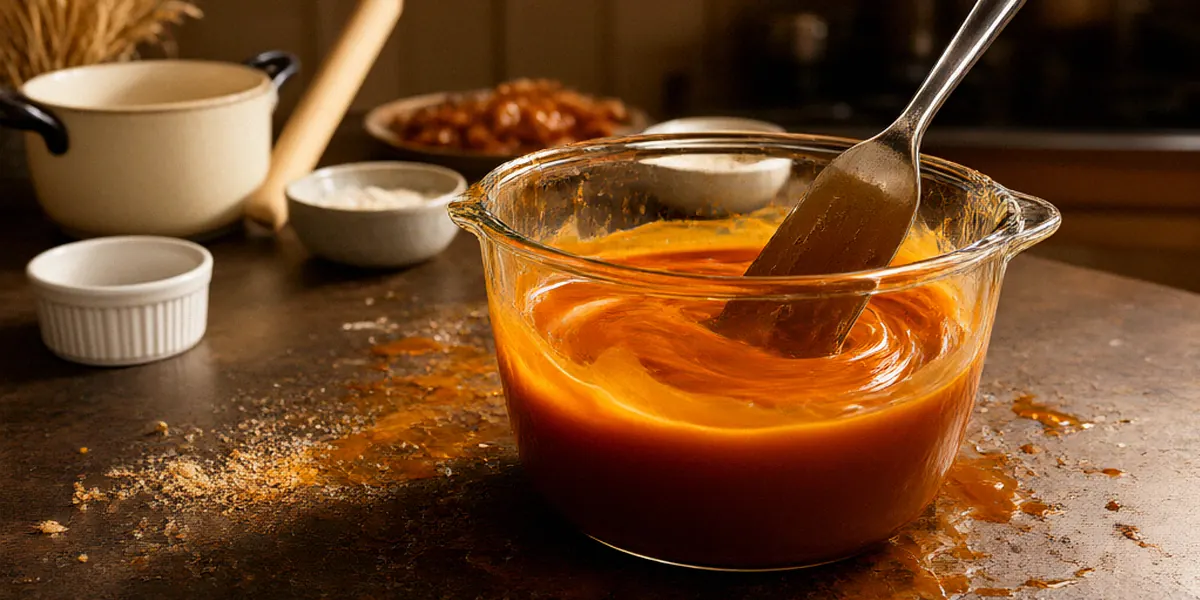
Most caramel failures come down to two processes that sound similar but behave completely differently: crystallization and caramelization. Once you can tell them apart, you can diagnose almost any problem in the pan before it ruins your dessert.
The Science of Sugar: Crystallization vs. Caramelization
Crystallization happens when sugar molecules lock together into a solid structure. A single stray sugar crystal on the side of the pan, or a spoon that has been stirred after boiling begins, can seed the whole batch and turn it grainy. Caramelization is different — it is the thermal breakdown of sugar into hundreds of new flavour compounds, which is what gives caramel its colour, bitterness, and depth. One is a physical accident; the other is the goal. Water, acid, and fat all interfere with crystallization, which is exactly why the wet method exists.
Australian Kitchen Challenges: Humidity, Altitude, and Sugar Types
Australian conditions genuinely affect caramel. Coastal humidity in Brisbane, Sydney, and Darwin means sugar absorbs moisture from the air, which can make dry-method caramel clump before it melts. In colder southern kitchens, sugar can take longer to dissolve in the wet method. Altitude matters less in most of Australia than in, say, Denver, but high-country bakers in the Snowy Mountains or Tasmania should expect slightly faster caramelization.
Brand matters too. CSR sugar is a common Australian brand for caramel and behaves predictably because it is highly refined and consistent. Bundaberg Sugar is another Australian favourite, particularly in Queensland, and works beautifully in wet-method sauces. Raw and golden sugars caramelize faster and darker than white sugar, so watch the pan more closely if you swap them in.
The Wet Method: Gentle, Forgiving, Foolproof
The wet method combines sugar with water before it hits the heat. The water dissolves the sugar evenly, which dramatically reduces the risk of crystallization. It takes longer, but it gives you a safety net — and a safety net is exactly what a beginner needs.
Step-by-Step: Water, Sugar, and Patience
- Combine equal parts white sugar and water in a heavy-based saucepan — 250g sugar to 60ml water is a reliable starting ratio.
- Stir gently over low heat until the sugar is completely dissolved. You should see no crystals on the base of the pan.
- Increase the heat and bring to a boil. Once boiling, stop stirring entirely — stirring at this stage invites crystals back in.
- If crystals form on the sides, brush them down with a wet pastry brush rather than stirring.
- Cook until the syrup turns a deep amber. Use a Thermapen to check the temperature; caramel colour begins around 170°C and deep flavour develops between 175°C and 185°C.
- Remove from heat and carefully add warm cream — Bulla cream is widely used in Australian baking and works perfectly here. Expect vigorous bubbling.
When to Use Wet Method: Sauces, Tarts, and Beginners
Choose the wet method for caramel sauces, Golden Syrup tarts, and any recipe where you want a clean, sweet, pourable result. Golden Syrup is a classic Australian ingredient for tarts, and it pairs beautifully with a wet-method caramel base because both rely on gentle, even heat. If you have never made caramel before, start here. Make it twice before you attempt anything else.
The Dry Method: Fast, Bold, and Full of Flavour
Dry caramel means sugar goes straight into a hot pan with no water. It is faster, darker, and more intensely flavoured — but it demands your full attention from the first second.
Step-by-Step: Direct Heat and Constant Vigilance
- Use a heavy-based pan — we recommend Scanpan or any thick stainless or cast-iron option. Thin pans create hot spots that burn sugar in seconds.
- Add a thin, even layer of sugar to a dry pan over medium heat. Do not stir immediately; let the edges begin to melt.
- As the edges liquefy, gently pull the melted sugar toward the centre with a heatproof spatula.
- Add the next layer of sugar once the first has mostly melted, and continue until all sugar is used.
- Watch the colour constantly. Dry caramel goes from perfect amber to burnt in under 30 seconds.
- Remove from heat and add butter or cream immediately to stop the cooking.
When to Use Dry Method: Candy, Garnishes, and Tempering Chocolate
The dry method shines for hard caramels, spun sugar garnishes, and darker caramel for crème brûlée. It is also essential when you are tempering chocolate and need a dry, water-free environment. If you are working on chocolate tempering techniques alongside caramel, keep the two processes separate — a single drop of water in tempered chocolate will seize it instantly.
Wet vs Dry: Side-by-Side Comparison for Australian Bakers
Here is the honest breakdown we wish we had years ago.
- Time: Wet method takes 10–15 minutes; dry method takes 5–8 minutes.
- Difficulty: Wet is beginner-friendly; dry requires experience and focus.
- Flavour: Wet is sweeter and cleaner; dry is deeper and more complex.
- Cleanup: Wet leaves a sticky pan that soaks off easily; dry often leaves hardened sugar that needs boiling water.
- Smoke: Dry caramel smokes more and can set off smoke alarms in small apartments — open a window or use a range hood.
Time and Temperature: What to Expect
Wet method caramel typically reaches 170–185°C in 10–15 minutes. Dry method reaches the same range in half the time but with far less margin for error. A Thermapen is not optional if you are serious about consistency.
Flavour and Texture: Which Wins for Tarts and Pastries?
For tarts, pastries, and sauces, we generally prefer the wet method because it produces a smoother, more pourable caramel that sets evenly. For candy, garnishes, and anything that needs a hard crack, the dry method wins on flavour depth every time.
Troubleshooting Caramel: Crystals, Burning, and Rescue Tips
Every baker we know has rescued at least one batch. Here is how we handle the common problems.
Fixing Crystallization and Graininess
If your caramel turns grainy, add a tablespoon of water and return it to low heat, stirring gently until the crystals dissolve. If that fails, strain the caramel through a fine sieve to remove the solid crystals — you will lose some volume but save the batch. For Golden Syrup tarts, a grainy caramel will show in the final set, so strain before pouring into the pastry case.
Saving Burnt or Seized Caramel
Burnt caramel cannot be un-burnt, but it can be used. A dark, slightly bitter caramel makes an excellent sauce for sticky date pudding or a bold drizzle over vanilla ice cream. If your caramel has seized into a solid mass, add warm Bulla cream and return it to low heat, whisking until it loosens.
When tempering chocolate, seized chocolate is a different problem. If water has entered the bowl, the chocolate will turn thick and grainy. The fix is to add a small amount of melted cocoa butter or a fresh piece of tempered chocolate and stir vigorously. Prevention is better than cure — keep every utensil bone dry.
Our Team’s Favourite Caramel Recipes to Practise
These three recipes build skills progressively. Start with the tart, then the caramels, then the pavlova drizzle.
Salted Caramel Tart with Australian Butter
Make a shortcrust base with Western Star butter — a trusted Australian brand for caramel work because of its consistent fat content. Blind bake it, then fill with a wet-method caramel finished with sea salt flakes. Let it set at room temperature, not the fridge, to keep the texture silky.
Tempered Chocolate Caramels for Gifting
Cook a dry-method caramel to firm-ball stage, pour into a lined tin, and cool overnight. Cut into squares and dip in tempered dark chocolate. This is where your tempering chocolate practice pays off — a proper temper gives that glossy snap and prevents bloom.
Caramel Drizzle for Pavlova
A simple wet-method caramel thinned with a little Bulla cream makes a beautiful drizzle for a classic pavlova. Add a splash of passionfruit pulp for a distinctly Australian twist.
FAQ
Can I use raw sugar instead of white for caramel?
Yes, but raw sugar caramelizes faster and darker. Reduce your heat slightly and watch the pan more closely. Bundaberg Sugar raw varieties work well in wet-method sauces.
Why did my caramel turn grainy?
Almost always crystallization — either sugar crystals formed on the pan’s side or you stirred after boiling began. Add a splash of water, warm gently, and strain if needed.
Is the wet or dry method better for tempering chocolate?
Neither — caramel and tempered chocolate are separate processes. But if you are working with both, use the dry method for caramel so no stray water contaminates your chocolate bowl.
How do I stop my caramel setting too hard?
Pull it off the heat earlier and add more cream or butter. Cooking to a lower temperature produces a softer set, which is ideal for tarts and sauces.
Can I make caramel ahead of time?
Yes. Caramel sauce keeps in the fridge for up to two weeks. Reheat gently with a splash of cream. Hard caramels keep even longer in an airtight container.
Fear of caramel disappears with practice — nothing else. Pick one method, make it twice in the same week, and you will feel the difference. Once you are comfortable, move on to tarts, pastries, and tempered chocolate, and you will wonder why you ever dreaded the pan.