Plating Desserts Like a Restaurant: A Home Baker’s Guide
You’ve pulled a golden tart from the oven, the pastry crisp, the filling just set. On the bench it looks like dessert. On a plate, with a swipe of coulis, a shard of tempered chocolate and a few native mint leaves, it looks like something you’d pay $22 for in a Melbourne bistro. So what actually separates home plating from professional presentation? It isn’t a commercial kitchen, a set of tweezers or a culinary diploma. It’s a handful of repeatable techniques — balance, temperature, texture and restraint — that any Australian home baker can practise on a Tuesday night.
Why Restaurant Plating Feels Different (and How to Close the Gap)
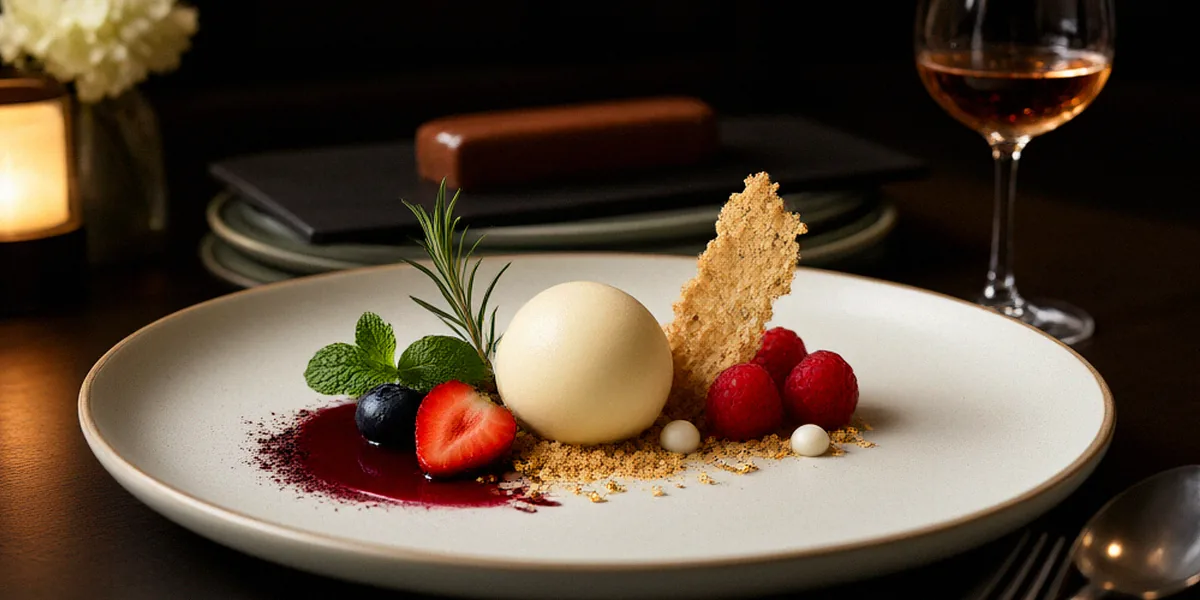
When we look at a restaurant dessert, we’re usually seeing three things working at once: balance, negative space and temperature control. The chef isn’t piling on more components — they’re placing fewer, better elements with intention. That’s genuinely good news for home bakers, because none of those three pillars require expensive equipment.
In Australia, you can pick up a decent offset spatula, fine sieve or squeeze bottle from Kmart for under $10, and if you want to go further, specialty retailers like Chef’s Armoury stock plating tools, microplanes and precision spoons that will last years. The gap between home and restaurant plating is mostly technique and repetition, not budget.
The Three Pillars: Balance, Contrast, and Negative Space
Balance means every element earns its place — sweet against acidic, rich against fresh, soft against crunchy. Contrast covers colour, texture and temperature: a warm tart with cold cream, a dark chocolate shard against pale meringue. Negative space is the empty part of the plate, and it’s the hardest habit to learn. Leave at least a third of the plate bare. The dessert reads as more considered when it isn’t crowded to the rim.
Tools You Already Own (and a Few Worth Buying)
- A damp clean cloth for wiping plate edges (essential)
- Two spoons — one for quenelles, one for sauces
- A small fine sieve for dusting cocoa or icing sugar
- A squeeze bottle from Kmart for coulis dots and lines
- An offset spatula for smoothing creams and moving tarts
- Optional: a microplane, a small blowtorch, and a digital thermometer for tempering chocolate
Building the Base: Sauces, Crumbles, and Creams
The base layer sets the tone for the whole plate. We’re talking about the sauce swipe, the crumble scatter and the quenelle of cream. These are the elements home bakers most often rush, and they’re the ones that make the biggest visual difference.
For consistent results, use reliable Australian dairy. Bulla cream is a widely available Australian brand that whips to a stable, pipeable consistency for quenelles and dollops, and it holds up in crème anglaise and caramel sauces without splitting. King Island Dairy cream is another excellent option if you want a richer, more distinctive flavour in your sauces and ganache.
Sauce Consistency: Nappe, Ribbon, and Pool
Three consistencies cover almost every dessert you’ll plate. Nappe is a sauce thick enough to coat the back of a spoon — ideal for anglaise and caramel. Ribbon is thinner, drizzles in a fine stream and holds a line on the plate — perfect for fruit coulis. Pool is a loose sauce that spreads into a natural puddle under the dessert, useful for berry or passionfruit sauces. If your sauce is too thick, loosen with a teaspoon of warm water or lemon juice; too thin, reduce gently or add a touch of cornflour slurry.
Texture Contrast: Crunch, Cream, and Chew
Every plate should hit at least three textures. A baked crumble (oats, butter, brown sugar, crushed macadamias) gives crunch. Whipped cream or crème fraîche gives cream. A chewy element — dried fruit, a soft caramel, or a piece of nougat — rounds it out. Scatter crumble in a loose line rather than a pile, and don’t drown it in sauce or it will lose its snap.
The Hero Element: Tarts, Pastry, and Tempered Chocolate
The hero is the centrepiece: the tart, the slice of laminated pastry, the glossy shard of tempered chocolate. This is where the eye lands first, so placement matters more than decoration.
Placing Tarts and Pastry for Height and Drama
Don’t centre a tart flat on the plate. Offset it slightly, then build height with a shard, a quenelle or a tuile leaning against the side. A round tart shell set just off-centre with a chocolate shard angled upward instantly reads as restaurant work. If you’re using laminated pastry, cut clean edges with a sharp knife and place the slice so a layer edge faces the diner — that lamination is the visual selling point.
Tempering Chocolate for Shards and Curls
Tempering gives chocolate a glossy snap and a mirror finish — the difference between a dull, streaky shard and a professional-looking one. Callebaut and Lindt chocolate are accessible in Australia for tempering practice, and both are forgiving enough for beginners. The quick method: melt two-thirds of your chocolate to 45°C, remove from heat, stir in the remaining third until it drops to 31°C for dark (or 29°C for milk), then spread thinly on baking paper, set, and snap into shards. Practise with 100g batches until the shine is consistent.
Garnishes That Work: Fresh, Edible, and Australian
Every garnish should add flavour or texture. If it’s only there for looks, leave it off — and never use non-edible garnishes like flowers from the garden, plastic picks or inedible leaves. Diners notice, and it undermines the whole plate.
Seasonal Fruit and Native Botanicals
Australian produce gives us garnishes no other country can match. Finger limes burst with citrus pearls that pop on the tongue — perfect over a citrus tart or pavlova. Native mint (also sold as river mint) adds a fresh, slightly menthol note that works beautifully with berries and chocolate. Macadamia praline — crushed caramelised macadamias — gives crunch and a distinctly Australian flavour. Use fruit at room temperature for aroma, and slice it just before serving so it doesn’t dry out.
Chocolate Curls, Tuiles, and Sugar Work
Chocolate curls are made by dragging a clean, firm blade across a set block of tempered chocolate at a 45° angle — the curl forms as the chocolate rolls. Tuiles are thin almond biscuits baked until lacy, then draped over a rolling pin while warm to set in a curve. Simple sugar work, like spun sugar or caramel cages, is impressive but fragile; only attempt it on a dry day and plate it at the last moment.
Plating for Real Life: Timing, Temperature, and Clean Plates
Restaurant plating looks effortless because the kitchen controls timing. At home, we’re plating four desserts while the ice cream melts and someone’s asking where the forks are. The trick is to prep everything in advance and assemble at the last possible moment.
The Damp Cloth Trick and Final Wipe
Before the plate leaves your bench, run a damp cloth around the rim. Any smear, fingerprint or stray crumb disappears in one pass. This single step does more for the perceived quality of your plating than any garnish. Keep the cloth damp, not wet, and fold it so you’re always wiping with a clean section.
Serving Temperature and Last-Minute Assembly
Ice cream and sorbet should go on the plate last, straight from a very cold freezer, and the plate itself can be chilled beforehand. Warm elements — tarts, sauces, crumbles — should be hot but not steaming, or they’ll melt everything on contact. Assemble in this order: sauce, crumble, hero, cream, cold element, garnish. Then wipe the rim and serve immediately.
Practice Plates: Three Restaurant-Style Desserts to Try
Here are three desserts to build your plating skills, using Australian baking staples you probably already have. CSR sugar and White Wings flour are reliable, widely available choices for pastry, meringue and crumble work.
Chocolate Tart with Tempered Chocolate Shard
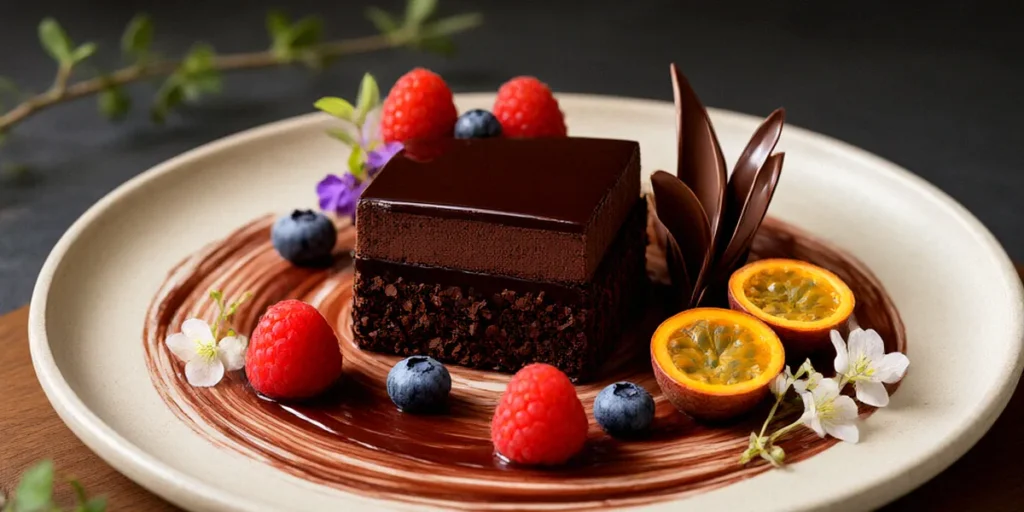
Make a shortcrust shell with White Wings flour and CSR caster sugar, blind bake, and fill with a dark chocolate ganache. Plate off-centre with a swipe of salted caramel, a quenelle of Bulla cream, and a tall tempered chocolate shard leaning against the tart. Finish with a few flakes of sea salt.
Lemon Tart with Torched Meringue Dots
Bake a lemon tart in a crisp pastry shell, then pipe small meringue dots (CSR caster sugar and egg whites) around the edge and torch until bronzed. Plate with a pool of raspberry coulis, a scatter of crushed pistachio, and a finger lime half squeezed over the top for citrus pearls.
Pavlova with Berry Coulis and Native Mint
A classic Australian pavlova, plated as individual mini shells rather than one large base. Spoon berry coulis onto the plate, sit the pavlova on top, add whipped cream, fresh berries, a macadamia praline shard, and a single native mint leaf. The contrast of crisp shell, soft cream and sharp coulis is the whole point.
Frequently Asked Questions
Do I need tweezers to plate desserts like a restaurant?
No. Tweezers help with very small garnishes, but a steady hand, two spoons and a damp cloth will get you 90% of the way. Focus on clean plate edges and deliberate placement before buying specialist tools.
What’s the easiest chocolate to practise tempering with in Australia?
Callebaut and Lindt are both widely available and behave predictably. Start with a 100g batch of dark chocolate, use a digital thermometer, and repeat until your shards snap cleanly and shine.
Can I plate desserts ahead of time for a dinner party?
Prep everything — sauces, crumbles, shards, whipped cream — but assemble at the last minute. Cold elements like ice cream should go on seconds before serving, and plate rims should be wiped immediately before the plate leaves the kitchen.
Which Australian ingredients make the best garnishes?
Finger limes, native mint, macadamia praline and seasonal berries are our go-to choices. They add flavour and texture rather than just decoration, and they’re easy to source from most Australian greengrocers and specialty stores.
Where can I buy plating tools in Australia?
Kmart covers the basics cheaply — squeeze bottles, small sieves, offset spatulas. For higher-quality tools like microplanes, precision spoons and plating tweezers, Chef’s Armoury is a solid Australian retailer.
Restaurant-style plating is a skill built through repetition, not talent. Pick one dessert from this guide, choose one new technique — a coulis, a tempered shard, a torched meringue — and practise it once a week. Within a month, your home plates will look like they came out of a professional kitchen, and you’ll have the techniques to prove it.